DIY Geometric Wall
Geometric walls are a great way to spice up your home and it doesn’t have to be a mammoth task to accomplish! Here at Inspirations Paint we’ve got you covered with the best tips and techniques to get that professional finish on your very own easy DIY geometric feature wall. Head into your local Inspirations Paint store to have a chat with our expert staff about your DIY project!
Designing Your Geometric Wall
Research different styles of geometric feature walls and find some examples you like. Check out our Project Gallery for ideas on colour combinations and geometric designs.
Once you have a design in mind, draw it up on a piece of paper or cardboard and make any changes to shapes or angles to play around with what might suit your space the best. Head in to your local Inspirations Paint store and chat to our friendly staff for expert advice on trendy colours and shapes. You’ll need to choose a base colour and at least one other colour for a contrasting top coat to create the geometric pattern.
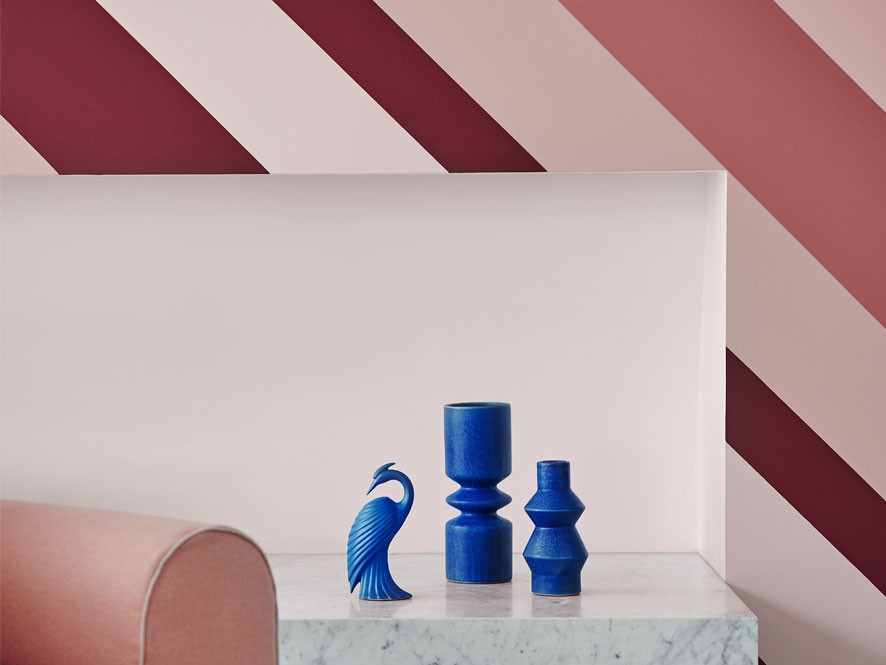
Here we have two different kinds of geometric designs, each with their own method to achieve their beautiful finishes.
The 'Peel and Reveal'
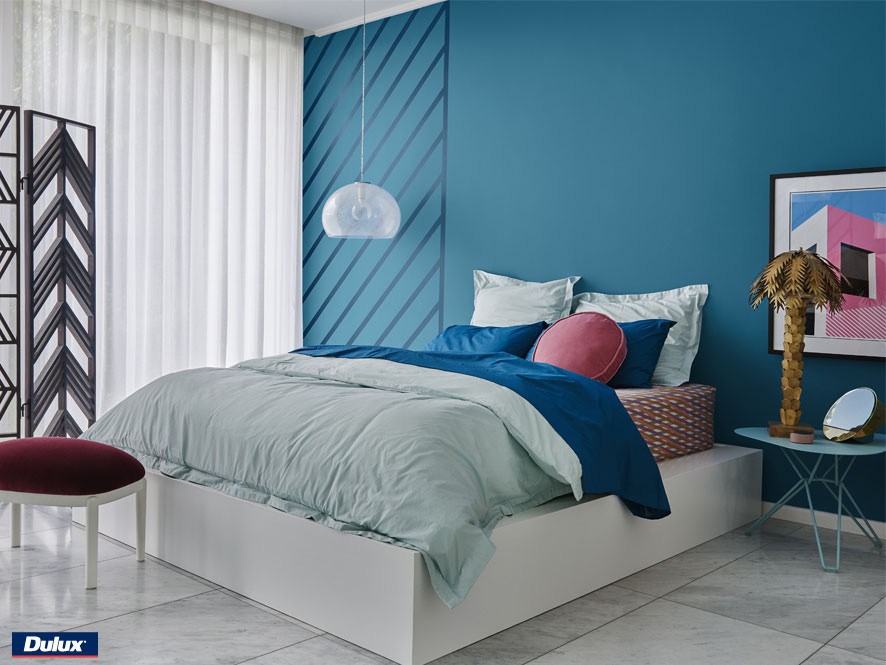
The 'Tape and Shape'
Set up for Painting
Remove furniture from the room you’re planning to paint, or move it away from the wall to give you plenty of space for painting. Laying down a protective covering over your floor and furniture is crucial to avoid any accidental spills or drips. Drop sheets offer the best protection for the job. Our article on drop sheets will be useful for determining which kind will be the best fit for your needs.
For a perfect finish you’ll need to clean down the surface of your walls to remove any dirt or dust. We always opt for Selley’s Sugar Soap as its safe for most washable surfaces and really preps the wall to be clean and ready for painting.
Depending on the design you may want to mask off skirting boards or edges near the ceiling to be safe. Spitfire 14 Day Painters Tape would be perfect for the job and comes in a variety of widths for every painting need.
Painting
The 'Peel and Reveal'
Paint 2 coats of your base colour over the entire wall and allow to dry completely between coats. The base colour will be the colour which will make up your geometric print, it will show underneath your top coat. Use a Maverick 230mm Micro-fibre Roller with a Spitfire 230mm Roller Frame for an even application. Wait 2-3 hours between coats for best results. You will need to wait at least 24 hours after the second coat has been applied before continuing on to the next step or you’ll risk peeling off your base coat.
Grab the piece of paper with your design on it and some painters tape and begin applying tape to the wall in accordance to your design. The width of the tape you’ll use will depend on your design and how thick you want the pattern to be but 24mm or 36mm is most common.
Measuring distances between the pieces of tape is the best way to ensure your design will be perfect. Try to avoid pencilling the design onto the wall before you apply tape as you will need to completely remove the pencil marks before you start painting.
Use singular long pieces of tape to ensure a perfect edge as multiple shorter pieces of tape will result in crooked lines. Make sure you leave a little overhang so when you go to peel the tape off it is easy to grab without disturbing the fresh paint - about an inch or so will do.
Once the tape is applied to the wall, ensure you have pressed the tape down firmly so when you paint over the top, there’s no bleeding. Any air bubbles or creasing right on the edge of the tape will result in an imperfect edge, if that happens its best to take it off the wall and apply a fresh piece of tape with no bubbles or creases.
Paint your top coat colour over the entire wall, including the tape. The tape will prevent the top coat from getting onto your geometric design. Once the entire wall is completely covered with the top coat colour, remove the tape slowly while the paint is still wet. Waiting for it to dry can result in edges peeling up and not looking as crisp. Pulling the tape off parallel to the wall is the best way to ensure a fine edge, if you pull the tape out away from the wall, you’re likely to come across uneven edges.
Be careful when handling the tape as it will have wet paint on it. Just put the tape into an old bucket and let the paint on the tape dry completely before discarding the tape into the bin.
Allow paint to fully dry and enjoy your masterpiece!
The 'Tape and Shape'
Choose which colour you want to be the base colour. Handy hint: choose the colour that will cover the most area in your design.
Apply 2 coats of your base coat to the wall, allowing to completely dry between coats.
Once dry, pick your next colour for the design, we’d suggest the next lightest colour, save the darkest one until last. Tape the wall in accordance to the design, outlining the desired shapes. You’ll be filling in the middle of the shapes to create the pattern. Once you’re happy with the design, paint in between the tape using a roller making sure to paint over the inside edge of the tape allowing the paint to settle into the edge creating that crisp edge. Use a small brush to reach into corners as a roller can be too big for that area. A great choice for the job would be a Maverick 63mm Sash Cutter as its small enough to get into those tight corners. Peel off the tape while the paint is still wet.
Allow 24 hours to dry completely before attempting to re-tape over paint you just applied. If you re-tape on paint that isn’t completely dry, when you peel the tape off, it will also peel off the paint that you just put down. Continuing on with a different section away from the paint you just applied would be ideal if your design allows.
Repeat the same taping, painting, peeling and drying steps with the remaining colours of your design until your design is complete then viola! Enjoy your beautiful geometric feature wall.
Summary Tips and Tricks
- Start with a lighter colour as a base and build up to the darker colours, it’s easier to paint over the top of light colours. However, if you do want a deeper shade as the base colour, you’ll just need to do 2 coats for each of your lighter shapes over the top, peeling off the tape in between each coat and retaping when its dry.
- Wait a minimum of 24 hours before you apply tape to a fresh coat of paint. This gives the paint enough time to harden so tape can be peeled back without ruining your efforts.
- Use painters tape, not just regular masking tape, as painters tape is designed specifically for the job, preventing paint bleeding through. It also removes cleanly without removing paint and won’t leave a sticky residue behind when left on for more than a few hours.
- Leave about an inch of overhang so you have something to grab onto when peeling back the tape. Peeling the tape from top to bottom is also the easiest way to do it.
- Paint over the tape. You need to do this to form the perfect edges you want to achieve in these designs.
- Peel the tape off when the paint is still wet! Don’t wait for the paint to completely dry. This could result in imperfect edges.
- If you forget to remove a piece of tape and the paint dries, don’t panic! Just grab a Stanley Knife and run it lightly down the edge of the tape, this will give you the best chance to peel the tape off and still have a great edge. If however, the edge isn’t perfect, no worries, just retape it and touch up the edges.
- Put the tape with wet paint on it into an old bucket and let the paint on the tape dry completely before discarding the tape into the bin.
- Don’t forget to clean your rollers and brushes straight after you’re finished using them - learn how here.
- Have fun with it! DIY projects are all about letting your creativity run wild and should never be too stressful!
Have a Chat to Our Friendly Experts!
Have any questions about your upcoming paint project? Don’t forget to head into your local Inspirations Paint store to chat with our expert staff for the best advice about which paint is right for your needs or even for help on which colours to choose!