Looking to brighten up your bedroom? Lemon might be just the colour you’ve been searching for. Fresh, uplifting and full of energy, lemon tones can instantly transform a space and bonus… lemon is trending right now. Whether you’re going bold with a feature wall or adding subtle accents through décor, this zesty shade is making waves in interiors for good reason.
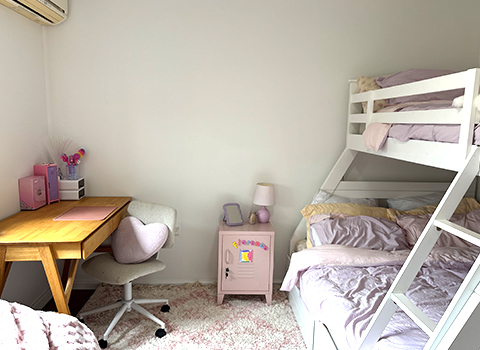
Here’s how we used lemon to transform this kid’s bedroom, adding brightness and joy to the bland space.
Lemon Stripe Wall
Our feed has been blowing up with stripe feature walls. From bold colour-blocked statements to soft, tonal accents, there’s plenty of projects to be inspired by. And inspired we were. This bland, white kid’s room presented the perfect opportunity to embrace colour and paint a lemon stripe feature wall.
Here’s how we did it:
Step 1:
We began by cleaning the wall to remove any dust and grime. Thankfully, this room was recently painted, so all the walls were in great condition. This meant that the clean was our only bit of prep work for this project.
Step 2:
Next, we needed to decide how many stripes we wanted and how wide they’d be. An air conditioner sat out in front of our planned stripe wall. For aesthetics and practical reasons, we wanted to make sure the stripes were wide enough so that we didn’t need to paint behind the air conditioner. We used ChatGPT to find the perfect stripe width.
Here’s the prompt we used:
Can you tell me what size to make stripes on a wall? The wall is 3285mm and one of the stripes has to be 180mm.
And here’s the response:
Great — let’s size them so the stripes fit exactly across the 3285 mm wall.
You want equal stripe widths.
Step 1. See how many stripes we can fit close to 180 mm
3285 ÷ 180 ≈ 18.25 → so 18 stripes is the closest.
Step 2. Divide wall by 18 stripes
3285÷18=182.5 mm3285 \div 18 = 182.5 \, \text{mm}
✅ Answer:
You’ll get 18 stripes of 182.5 mm each — perfectly filling the wall with no gap.
Now that we had our stripe width, we then measured the stripes. To prevent marking the wall with pencil, we masked our trims with masking tape before measuring. This way, we could mark the tape, not the wall.
Step 3: Tape
We then applied masking tape along the outside edges of each stripe. It was important to take our time here. Accurate taping makes all the difference.
Step 4: Bleed Seal
Before painting our lemon stripe, we needed to bleed seal the tape with the base wall colour. This is the key to achieving crisp, clean lines (a must for any stripe wall).
Step 5: Paint
Once the bleed seal was dry, we applied 2 coats of Dulux Wash & Wear in Lemon Blast to the stripes. We first cut in with a brush along the top and bottom of the wall before rolling with a mini roller. We allowed the first coat to dry before moving on to the second.
Step 6: Remove Tape
While the paint was still slightly tacky, we gently peeled off the tape at a 45-degree angle from the wall. This helps avoid tearing and ensures a clean edge.
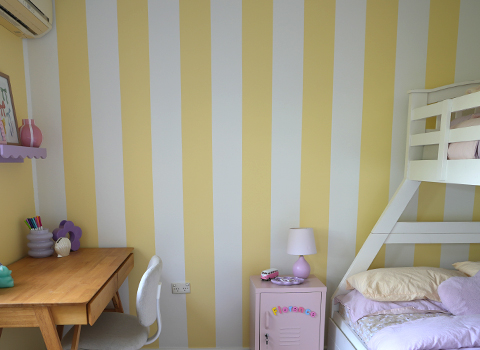
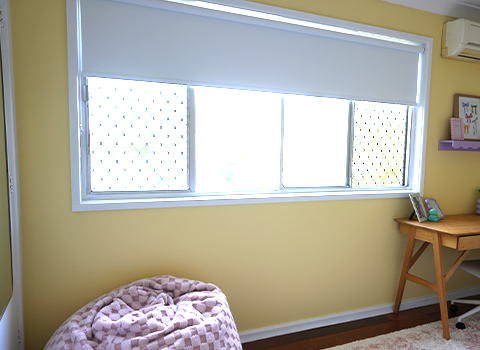
Lemon Feature Wall
The original plan for this space was to paint the striped feature wall and then hack a Kmart wave shelf for the study nook. But as we got further into this project, we felt it needed more. More personality. More colour. More lemon. So, we pivoted to include a lemon feature wall in the room as well.
Here’s how we did it:
Step 1:
As with our stripe wall, we began by cleaning the wall to remove any dust and grime.
Step 2:
Next, we masked around the edges of the feature wall, trims and window frame with masking tape.
Expert Tip - Keep the tape fanned out along the trims and window frame to help catch paint drips and prevent excess cleaning.
Step 3:
Then, we applied the first coat of Dulux Wash & Wear in Lemon Blast to the wall. We cut it along the edges and trim before rolling. We worked in sections along the wall the prevent any picture framing. Once dry, we applied the second coat.
Step 4:
Finally, once the second coat was dry, we removed the masking tape to reveal our fully formed lemon feature wall.
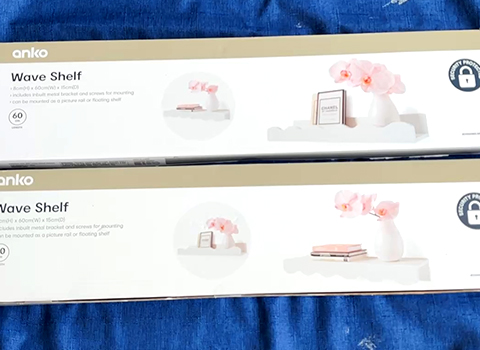
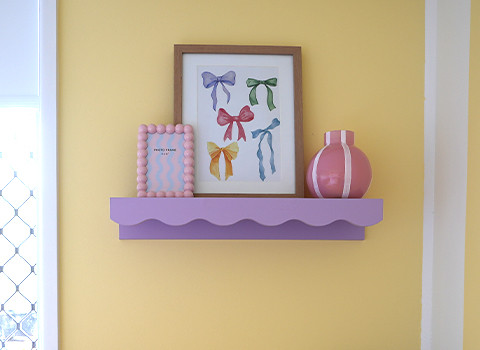
Purple Kmart Wave Shelf Hack
The final project of this bedroom glow up was one of our favourite Kmart painting hacks. Traditionally, it was thought that you couldn’t paint melamine and so we had to just deal with boring, white shelving. But, with the right products, customising Kmart shelves is easy.
Here’s how we did it:
Step 1:
First, we sanded down the shelves with 120 grit sandpaper to dull the smooth finish of the laminate surface. This is essential to ensure the primer and paint stick to the surface. Next, we wiped away any dust from the shelves with a microfibre cloth.
Step 2:
Next, the most important step, we primed the shelves. We applied 1x coat of Dulux Precision Maximum Strength Adhesion Primer to the shelves with a brush and allowed it to dry completely. We recommend this primer for tough-to-paint surfaces such as laminate. This will give your top coat the best surface to stick to, meaning a long-lasting finish for your shelves.
Step 3:
Lastly, we applied 2x coats of a stunning purple from Berger called Dorinda Dark to the shelves with a brush. We allowed the first coat to dry fully before moving on to the second.
A lemon-inspired bedroom is more than just a colour choice, it’s a mood booster. With the right balance of tone, texture and styling, you can create a space that feels fresh, inviting and uniquely yours. Whether you’re going soft and sunny or bold and bright, lemon is a versatile shade that brings life to any room and this kid’s bedroom is the proof.
Visit your local Inspirations Paint store for expert advice, colour samples and everything you need to bring your next project to life.